threefunnyvoices

Life, How To's, and Other Various Ramblings

Adventures in the land of SuperBugs (AKA: Nifty Home Remedies) October 25, 2013

Hi!

I know it has been FOREVER since any of us have posted but life, as usual, gets in the way.  Lately, life has revolved around school and dealing with a child who has been incredibly ill. For those of you who do not know, let me catch you up to speed.  (There is a fair amount of rambling to start this post. If you would like to jump ahead and head straight for the Homemade Pedia electroLyte drink recipe or the homemade cough syrup recipe go right ahead…scroll away)

Last Saturday, the boy and I suited up the grandparents and great grandmother and headed off to the state fair. We had a GREAT time while we were there and my three year old was better behaved than most adults that we saw. He rode his first ride, saw his first tractor pull and even tried his first cotton candy. Life was good.

Around 4pm we decided it was time to end our adventure and we started the 2.5 hour drive back home. The decision was made that we would stop at Olive Garden for dinner about half way back. By the time we got there, the little one had been asleep for almost an hour. We woke him, waited for our seat and were pleased to see that we were put all the way in the back of the restaurant. It gave the boy a bench to sprawl out on and rest until dinner got there. We placed our orders and he was still as lifeless as they come. Our salad and breadsticks came and he was STILL lifeless. He normally jumps at the prospect of a breadstick. By the time I had finished my salad, I got a feeling that something was seriously not normal with the little fella, so I picked him up and snuggled him and started the head to toe checklist.

“Does your head hurt?”

“Do your ears hurt?”

“Does your belly hurt?”

I got a “no” in response to all of these questions. Then he started mumbling and next thing I knew, he did it….

He tossed his cookies right there in the middle of Olive Garden. And not just a minor “oops”.  It was a horrifying site and it took a stroke of genius on my mother’s part to contain the catastrophe. When he finally slowed down, we made a break for it. The whole time, we chalked it up to “Oh…he had too much junk at the fair”. Then we realized that he had had a slice of pizza and a little bit of cotton candy…for the entire 6 hours we were there. Then I felt his head and my poor baby was burning up! We made nice with the restaurant staff, left a hefty tip and busted outta there after cleaning him up for the trip home.

I finally got him in the door and settled in for the night…and that was supposed to be it.

Fast forward 1 week and this is the situation:

After 6 days without any real food in his system, sleeping for 90 minutes at a time (with multiple hours in between), night terrors, a fever that could not be broken, countless “Get the boy outside, he’s gonna be sick” moments, two trips to the pediatricians, some fluids and a blood test, we have established that he has a super bug. This is the sickest he has ever been…and he has had chicken pox 3 times.  He has lost 2 pounds in a week and is hurtin’ in the iron department.

Thankfully, we have an awesome pediatrician who helped us find a heavy duty anti-nausea medication which has allowed him to finally eat a little something and has restored my hope that one day, my child will once again be the child that I know and love and not a little male version of Linda Blair and a bowl of split pea soup.

I spent a lot of time, in the early morning hours, searching for something….ANYTHING…I could try that would help my poor baby feel better. I found some things that helped him maintain. Knowing now what we are facing, that was the best anything was going to do so long as he was unable to keep food in his system.

First, let’s go for the:

Homemade PEDIA electroLYTE drink…
REMEMBER: DO NOT GIVE CHILDREN UNDER THE AGE OF 1 HONEY

This is SUPER easy to make and so much cheaper than the stuff you buy at the store.

You will need:

1/2 cup of boiling water

1/2 teaspoon of salt

2 tablespoons of sugar (or honey…or raw sugar….or agave)

3 tablespoons dry jello powder (any flavor your little one likes)

3 1/2 cups of cold water

In a bowl, combine the boiling water and dry ingredients.  Stir until everything is completely dissolved. Add cold water and serve at room temperature, by the spoonful every 5-10 minutes for an upset belly. If it is to lower a fever, you can serve over a little ice.  Pour in a container and store in the fridge for up to one week.

Maybe you are a bit like me and think that a sick child needs variety and therefore you make three different flavors of this stuff and at the end of the week you still have it coming out of your eyeballs! Have no fear…it shall not go to waste! Pour it into ice cube trays and freeze it so that you always have it on hand should the little buggers need it again. I found that these work really well.

Now comes the really fun stuff.

HomeMade Cough Syrups

We lucked into some local, raw honey this week at a steal so I went a little crazy and made a variety of cough syrups.

You will need to get some glass jars with lids…I like the Walmart version of a Mason Jar the best (a pint size will be fine)

LEMON GINGER SYRUP:

1 Lemon

1 piece of raw ginger 2-3″ long

Thinly slice one whole lemon and put 1/4 of the slices in the bottom.

Peel your ginger and gently crush it.  Cut it in quarters and place 1 piece in on top of the lemons.

Add approx 1/3 of a cup of honey.

Repeat the process until all ingredients are used OR you run out of room in your jar.

Let jar sit in the fridge for a minimum of 8 hours, over night is best.

During the first day or two your honey will be thick, but as time goes on it will thin out. You can take by the tablespoon full, directly out of the jar or add it to a cup of tea.  GOOD STUFF and the lemon will provide you with Vitamin C, the ginger will help with any nausea that you may have.

SPICY:

Fill your honey jar approximately 3/4 full and add 1-2 tsp of cayenne pepper (dried) to it. The cayenne will provide you with capsaicin, which is a natural pain reliever. Add this to a cup of homemade cocoa (Not instant cocoa…the honey would make it WAY too sweet) and have yourself a little Mexican Hot Chocolate to help soothe those aches and pains! OLE!

SUBSTITUTIONS:

Swap out your lemons for oranges or grapefruit.

Add a sprig of rosemary to your lemon or orange honey for improved circulation, additional iron, Vitamin B6, and calcium. It will also help with muscle pain. You can use fresh or dried.

Mint Leaves (fresh) will help with digestion and will help soothe the effects of IBS and clear skin issues such as eczema and acne.

The longer you let them sit, the stronger they will be. The honey will help preserve the fruit to prevent it from spoiling. You will be able to hold on to these for several weeks in the refrigerator. However, if you are like me, you will find various reasons to use them…reasons like “OH! That one tastes good, let’s have a scoop!”

So there you have it…a couple of the nifty things I learned through the last week. I also learned how to make my own Vapo-Rub and I will post the instructions soon. For now, however, I must get some sleep because 90 minutes have come and gone and the little monster shows no signs of waking up any time soon! YAY!!
 

Easy Peasy Cleaning Cloths July 24, 2013


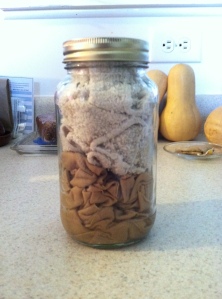
It seems that I am always running out of dish cloths because I am CONSTANTLY cleaning up random messes made by the resident 3 year old.  This means that I always have multiple wet rags that never really dry because it is so stinking humid here in the summer.  This oogs me out. Too many bugs…too much blech icky grossness in a dish rag…just too much gross for me to have scattered about my kitchen.  It was because of this that I set out for a solution. I hit my favorite DIY/Homemade goodies website

Jill always seems to have an answer to what I am looking for.  This day held true to that statement. I found her recipe for Homemade REUSABLE Repurposed Cleaning Cloths.  Since I had all of these items on hand, I set to making them right away. I AM IN LOVE!

If you use a plain scented castile soap, you can add any essential oil that you like. I had lavender soap so I added a few drops of peppermint and a few drops of rosemary essential oil to the soap and water mixture. I know it sounds like an odd combination, but it smells heavenly.  I use the cloths all day every day. When they get gross I just throw them in the washer and then back in my jar of solution. I don’t even throw them through the dryer. What’s the sense of drying something that you are just going to throw immediately into a jar of liquid, right?

These things save so much time and money and you don’t have to worry about chemicals being smeared all over your counters and skin. If you try them please let me know what you think.

** I, personally, would cut back on the soap a bit or beef up the amount of water. It is a little soapy for me, but I just rinsed the cloths a little before I used them. Live and learn J

~C


How 2 Cups of Flour and 2 Cups of Water Saved My Sanity April 22, 2013

By the time the milk paintings were complete, I thought that B was ready to calmly face the world. HOLY MOSES WAS I WRONG!!

What to do? What to do?

Then I remembered reading a post a while back about “Magic Playdough” The woman who wrote the post makes astronomical amounts of plain play dough every year for the first day of school. She separated the dough into individual balls (saving two balls to use later), pushed a well into the top and added 7-10 drops of food coloring into the well. Then, she took took the two balls she had held back, and used little pieces to plug the hole in the others. The goal is to have a collection of plain colored balls that look like there is nothing special about them. She then wrapped them up, added a little note about “mix and mash and if color should appear, it will be a great school year”. I thought this was adorable and wanted to try it at home…sort of.

We obviously did not need 50 balls of play dough so I scaled the recipe WAY back and added a little extra something to it. Here is what I came up with.

Magic Play Dough

2 cups of flour

2 cups of water

Lavender Essential Oil

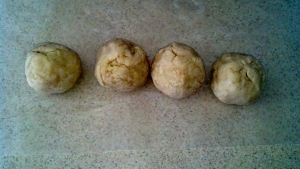
place all ingredients in a pan on the stove and cook slowly (while stirring regularly) until it comes together and looks like dough. When it is done, place it on a piece of wax paper and knead it until it is nice and smooth. Divide into 6 balls and put two back. With the remaining 4, use your thumb to push a well into the balls. Add 7-10 drops of food coloring per ball. Fill hole with pieces of dough from extra 2 balls and GENTLY form them so that they look like a plain white ball of dough.

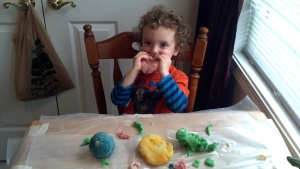
2013-04-22_12-02-27_646

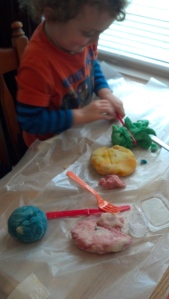
As the dough was cooling, I lined the table with some wax paper and taped it down and got some plastic silverware and other small things that would make fun imprints in the dough.

2013-04-22_12-02-18_393

Then I unleashed the wild child on his first real encounter with play dough…

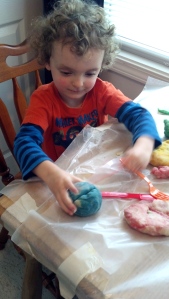
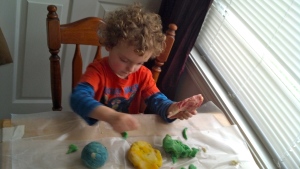
We mushed, and folded, and mushed and folded and mushed and folded and mushed and folded…

2013-04-22_12-08-06_726

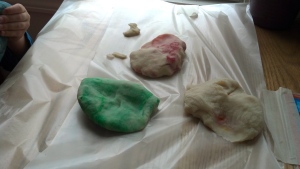
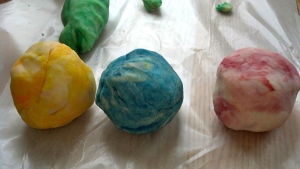
And ended up with these (I would add more red food coloring next time)

2013-04-22_12-12-46_445

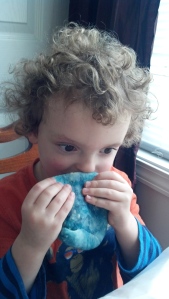
It took no time for him to discover that it smelled good (and all that lavender helped calm him down…like, whoa)

2013-04-22_12-08-13_914

And it felt good

2013-04-22_12-14-49_37

And because I made it, I knew exactly what was in it and I didn’t freak out when he did this…

2013-04-22_12-19-43_318

Let the games begin…

2013-04-22_12-22-23_6

2013-04-22_12-19-28_966

2013-04-22_12-22-29_768

2013-04-22_12-19-55_885

And THAT is how 2 cups of flour and 2 cups of water (and a little Lavender Oil)  saved my sanity!

The dough will store nicely in ziploc bags and keep for quite some time. Best use of flour and water I have seen in weeks!

~C

PS: As I sat, enjoying the quiet stillness that this activity blessed me with, I couldn’t help but think that this would make for a GREAT party favor for your little ones birthday party…especially if it is a Magic theme!


A Home with a Gun? April 14, 2013

Filed under: Things that might be a little touchy — threefunnyvoices @ 9:31 pm
Tags: , , , , , , , , , , ,

Guns are a big thing down here. Most of the time, if you ask someone why they carry a gun you will get the response “because I can.” Knowing this, when Brennan is asked to go to someones house to play, I ask if there are guns in the house and if so, are they locked up so that the kids can’t get to them. Fair enough, right? Apparently not. I was told tonight that it’s none of my business and I had a lot of nerve asking. (Only in not terms not as nice as this)


So, I ask you…do you ask?


I ask because I am trusting that other parents are going to protect my child as I would their child. I ask because I know my child well enough to know that if he saw one, his curiosity would most likely get the better of him. I ask because I feel it is my right as a parent to know. But is this right?

I never knew when I became a parent that there was such a HUGE gray area and very little black and white. I am learning I operate better in the black and white.

How do you handle the gray areas when it comes to your child and their safety in the home of someone else? How do you ask the tough questions without coming across as judgmental or rude? Do you care if you DO come across that way?

Leave your answers below…I am truly interested.


~C


How to Appear Manic to the ENTIRE WORLD!!! March 15, 2013

Filed under: Uncategorized — threefunnyvoices @ 10:19 pm
Tags: , , , , , , , , , , , , , , , ,

If you haven’t read my post from earlier this evening, this will not make any sense. I will sound like a mom boo-hoo’ing about her sick kid…

Since my last rambling and selfish display, I have had to make a temporary bed for my child, in the bathroom, with the shower on as hot as it can get so I could get some steam action for him. A simple humidifier was not cutting the mustard…and thank God for my medic friend who reminded me of this trick. (Which, subsequently, I learned back in the day while watching Terms of Endearment) For a brief time, the boy slept…soundly…and without struggling to breathe. Then, just like that, it was over.

There is not enough hot tea, Vicks or steam in the world to get this kid to get a nice deep breath. So now I am sitting here hoping and praying that we don’t have to make the 30 minute drive to the closest ER in the middle of the night. I want so badly to make everything ok for him…to hear him sleep without snorting and snarfing for every breath. When he wakes up crying it breaks my heart and there’s not a damn thing I can do. Having a sick kid SUCKS!

Thankfully (?) I have come to the realization that I am not going to sleep again tonight. Accepting it is just necessary at this point. This, however, has allowed me the ability to prop him upright in a bean bag and set up a stock pot on the stove to steam the front half of the apartment. Hopefully this will give him the chance he needs to get some good healing sleep so that tomorrow we don’t have to go through this all again.

In closing, I would like to thank all those parents who over medicated their children and used cold medicine to turn their kids into zombies so that I can sit here tonight, without an option to medicate my boy who would greatly appreciate it. You guys are awesome and deserve Parent of the Decade awards! Bravo!

~C


This is just plain helpful! February 25, 2013

I am an avid reader of the blog at http://www.onegoodthingbyjillee.com. I LOVE her suggestions and how to’s.

These are two of my favorites:

How To Clean Your Washing Machine

Top Loader

http://www.onegoodthingbyjillee.com/2012/04/how-to-clean-your-top-loader-washing.html


Front Loader:

http://www.onegoodthingbyjillee.com/2012/02/how-to-fix-smelly-washing-machine.html


How To Clean Your Dryer:

http://www.onegoodthingbyjillee.com/2012/02/give-your-clothes-dryer-tune-up.html


These are the best things I have done in my house….period! I was given a hand-me, hand-me, hand-me down washer and dryer. They work fine but needed some SERIOUS love and affection. I knew that Jill would have the answer so I looked and low and behold, I got the answer I was looking for. They take some time, but they are SO worth it. These few steps restored my machines to an almost new condition. I am a believer! If you try them, let me know what you think!


~C


Why should kids have all the crafting fun??

I hate my kitchen window…my kitchen in general…but definitely the window.

It has white blinds and looks out onto a farm supply company and a light pole. WHOOPIE! It is so blah and OF COURSE that is where my sink is, so I look at blah all day….until this weekend came! No, I didn’t move but I got crafty…literally. (Shocking, I know)

I had some frosted glass ornaments and acrylic paints left from this past Christmas and the gift that my son made for everyone. They were just sitting in my closet taking up space so I decided to do something with them. I took to etsy.com and found some ornaments that I could easily make and this is what I came up with….

They are SO fun to make and look at…and easy as can be.

Here’s the lowdown

1. Gather clear/frosted glass/plastic ornaments with the removable tops and acrylic paints .

2. Remove the top and add small amounts of pain to the inside of the ball

You can either put the paints in the ball in separate areas, like I did here, or you can pile in all in on top of one another. If you choose to do the second option, I would use smaller amounts of paint and do the layers in three or four spots around the inside of the ball. It will make it easier later on.

3. Place your finger over the hole and shake.

Word to the wise…Don’t space out and forget that you are holding something in your hand and drop it….not that I would know by experience or anything. Also, have an old rag to wipe your finger on. It will get paint on it.

You may need to add a little extra paint as you go along, but that’s ok. Less is more in this situation.

4. When you are done shaking, you should end up with something that looks like this:

5. Put the balls back into the box they came in, leaving them uncovered, and place it somewhere safe that it will not be disturbed for the next 24(ish) hours so that the paint can dry.

6. Once they are dry (or at least dry enough that the paint isn’t running everywhere) place the top of the ball back inside. Be careful…

7. You can stop here if you like.

They are pretty and will serve their purpose. Personally, I like to fancy them up a bit, taking them from this:

To this:

The bows are SUPER easy to make… Here’s a photo I got from wantu.taobao.com

Once you are done with the bows, simply hot glue them to the top of the ball, close to the loop that you use to hang the ball.

That’s it! SO easy, right??

Here are a few of the ones I created this weekend:

2013-02-25_10-10-13_4862013-02-25_10-11-09_400

I have three of them hanging in my kitchen window at various lengths. I LOVE them. They add a pop of color in a plain white room overlooking a rather blah scene. Because of the shape and colors they do not make it look like I forgot to take down my Christmas decorations, which adds to my love of them as well. I will get a picture of the window up, just as soon as night comes and the colors will actually show up.


~C


Looking for Something to Do With Those Empty Toilet Paper Rolls? February 22, 2013

For some reason, I felt like I should keep my empty t.p. rolls….and now I have an overabundance of them. (It would have behooved me to have a purpose for them when I started saving them because I have enough of them to arm the entire neighborhood with today’s craft project. *sigh*)


Anyway….


I recalled that somewhere along the line, either as a big sister, a baby sitter, a classroom aid in a daycare or in my Childhood Development classes, we made binoculars out of T.P. rolls.  This was perfect timing because B is a huge fan of playing “explorer” right now so we took to the task of making him a set. It was so easy…and took no time.

HERE’S WHAT YOU WILL NEED:

2 empty tp rolls

glue gun

markers/crayons/paint/stickers (whatever you want to use to decorate them)

ribbon/string/yarn (something to make a strap with)


Start by plugging in your glue gun so it is ready to use when you need it

Set up your little one with the rolls and the chosen decorating tools and let them go to town. (While they are doing this, the adult can cut the ribbon they will need to use as a strap)


2013-02-21_12-45-59_92 2013-02-21_12-46-31_286


After you have accomplished the task of decorating your one of a kind binoculars, it’s time for an adult to glue them together. Just run a line of hot glue along the side of one of the tubes and press the two tubes together.

Now, add a dot of glue on the inside of the tube, but on the outside curve, on both tubes and attach your ribbon.

When you are done, you should have something that looks a little like this:


That’s it!

Now, if you are into something a little more structured and decorative, you can find instructions on how to make camo binoculars here: http://www.freekidscrafts.com/binoculars-e1148.html

I am sure that if you search Pinterest, there are lots of patterns and ideas, but I prefer to let B make his own design.

Ok…go enjoy yourselves and let us see some of those lovely creations!

~C


The Jiggly Bits

...because life is funny.

Scary Mommy

Life, How To's, and Other Various Ramblings

threefunnyvoices

Life, How To's, and Other Various Ramblings